
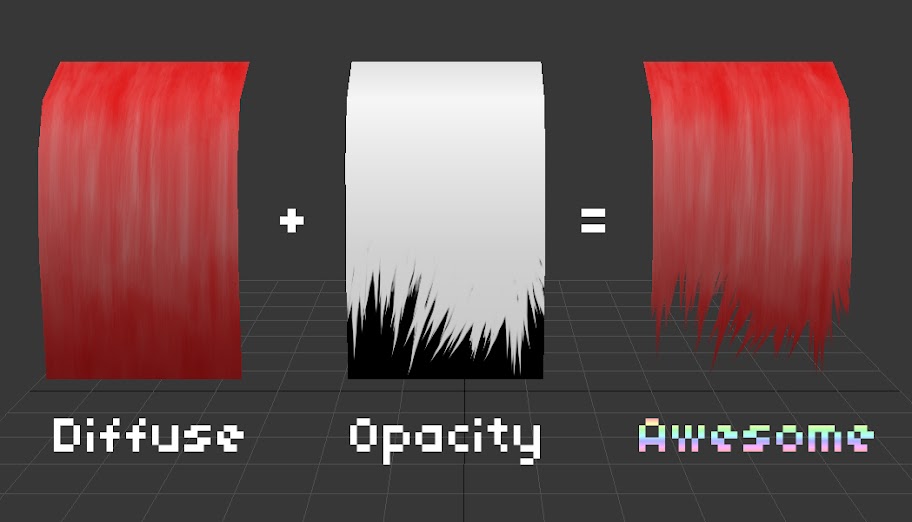
By combining different types of maps, like Diffuse, Normal (Bump/Displacement), or Specular, you can create very well-rounded textures for objects and characters. Opacity Maps create the illusion of transparency, using greyscale colors to determine how and where the image is transparent (black) or opaque (white). In the example above you can see how the white portion of the texture is the only part of the plane that remains after using the Opacity Map. Using this technique, you can turn a plane into a variety of objects with ease, without having to add to your poly count to create specific edges or corners on a character/object.
Strands of hair, a torn and tattered cape, the lining of a frilly dress, or even special effects like waves of energy or slash marks, you name it. Just use your imagination! :D
Why model every clump of hair when you can drape a plane over your character's head, paint some hair, then use an opacity map to create some sweet locks?
Creating a black and white image doesn't necessarily constitute a tutorial, but how would you go about creating an image like the one above? Very fine edges can be difficult to make, so I'll let you in on a little trick that'll help you create hair like that in a matter of minutes.
Hit the jump for the info.

Under the Brushes window in Photoshop, you'll find the Shape Dynamics options. By changing the control to Fade and playing around with the Fade value, you can simulate a realistic brush stroke. Using these settings with a white brush, just simply paint and layer your strokes on top of one another to create that clumpy hair look you're going for.
Note: Keeping your brush opacity at 100 will maintain crisp, sharp edges in your alpha map.

When you're finished, save your image as a .jpg, .png, or whatever format you prefer. Then, in 3ds Max's material editor, select your material and locate the Maps rollout. Like the image below, add your recently saved image to the 'Opacity' channel highlighted.

After applying the Material to your plane, only the white parts of your image should be displayed. Any diffuse map you have will be present, of course, like the red hair I'm using in my example, so you can use whatever image/paintjob you've come up with. Try it out, play around with some settings, and most importantly have fun!

Useful Resources:
Ben Mathis - Low Poly Hair Texturing
Paul Tosca - "Varga" Hair Tutorial (Maya)
Michael Dashow - Texture Painting
I love hair (and lamp)
ReplyDeleteNice post mate, keep up the great work, just shared this with my friendz why is mars red
ReplyDelete